Camera and Video

Selecting Your Camera
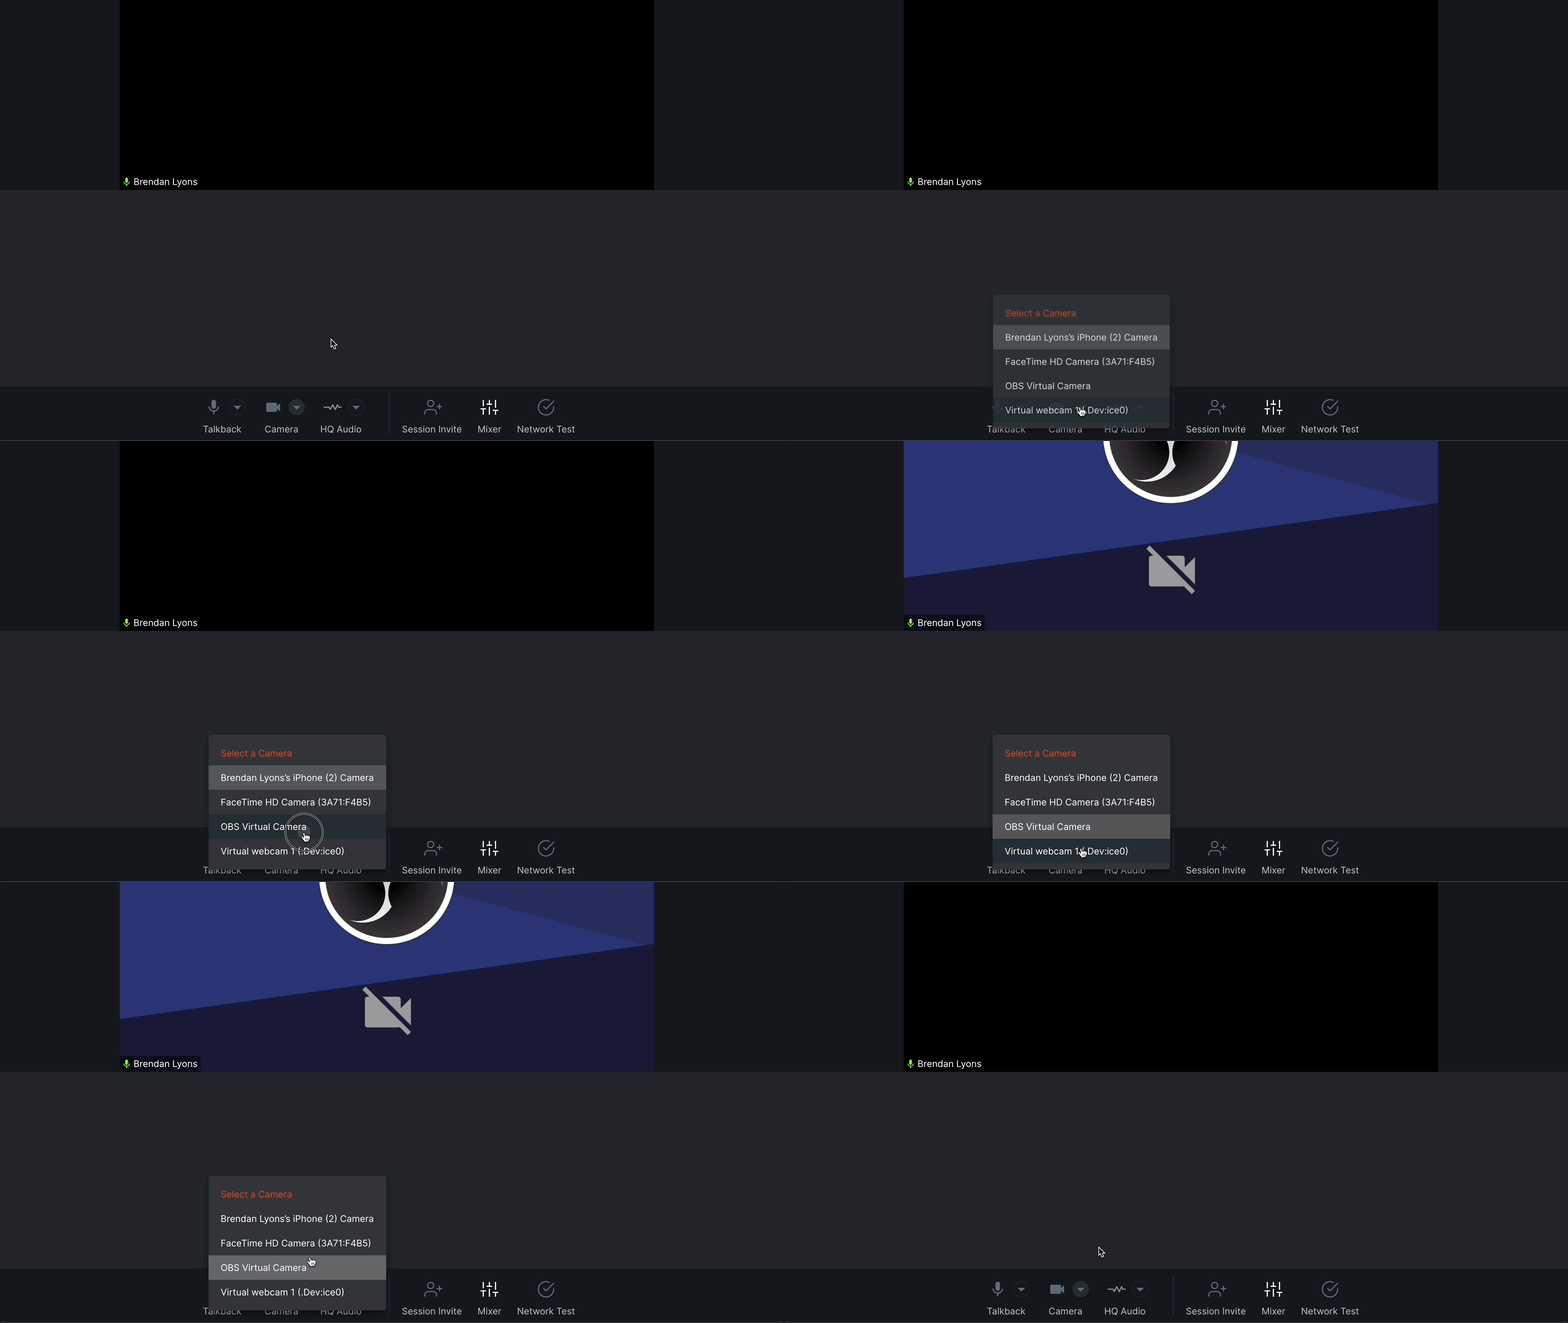
To select your camera, click on the triangle just to the right of the Camera icon in the bottom toolbar of your studio. A list of valid video sources will be displayed in the Select a Camera list and you can choose from one of the available camera options.
Note: Camera settings are saved between sessions so you won’t need to do this repeatedly.
Starting and Stopping the Camera
This process is usually referred to by us as muting and unmuting the video. While not exactly accurate, it gets the point across and makes the language in our documentation less complicated!
To mute and unmute your video simply click on the camera icon located at the bottom of your studio in the toolbar. When muted your video pane will become black when you're not in a live session. When you mute the camera during a session your video pane will display the avatar you have added in your Sessionwire Profile.
Muting and Unmuting Guest Videos
If you need to mute the video of a guest in your session you can do so by moving the mouse cursor over their video pane. This will show the hover controls, a row of control icons that are normally hidden to avoid visual clutter. One of these icons is a camera icon. Clicking this control will toggle the video mute state of the selected guest.
Changing the Video Layout
Like many other video chat and conferencing applications Sessionwire has two main modes for laying out the videos of your session guests: Grid and Speaker. The layout mode can easily be switched by clicking on one of the two icons in the upper right-hand corner of the studio window.
Grid Mode
Grid mode is the default and all of the guest’s video panes will be automatically resized to fit in the space available in your studio.
Speaker Mode
Speaker mode will fill the space available with the currently active speaker. The remaining videos will be reduced in size and placed in a vertical row on the right side of your studio.
Note: The Speaker mode format is also used while screen sharing. You can learn more about screen sharing in the Screen Sharing article in the Knowledge Base.
Exploring the Video Panes
There are lots of interesting features available in Sessionwire’s video panes.
Common elements for video panes include:
- A Talkback status indicator to help quickly identify a muted guest microphone
- The display name of the guest
- A special label for the host as a reminder that you are in their studio
The Host Video Pane
This is the pane that displays the video stream from your camera.
In the lower right corner of the video pane there is an icon that displays a popup menu containing the following options:
- Mirror local video
- Add background image (beta)
- Turn on background blur (beta)
These are pretty much self explanatory, feel free to experiment!
Note: There are no hover controls for your local video pane.
Guest Video Panes
Each guest in your session will have their own video pane, with the exception of Audience members who are invisible. Audience members join without video or voice participation in the session but they can connect with you using Studio Chat. You can learn more about the Audience role in the Knowledge Base article Sessionwire Roles.
Options Menu
Just like in the host video pane you will find an icon in the lower right corner that displays a popup menu containing the following options:
- Auto hide remote controls - turn off to display Hover Controls at all times
- Enter picture-in-picture - float a resizable, always-on-top video pane you can place anywhere on your desktop, even over a DAW interface. Note only one person is the session can be in picture-in-picture mode at a time
- Make Audience - Turn a Guest into an Audience member (see Sessionwire Roles for more information)
- Make Moderator - Nominate a guest as a Moderator (see Sessionwire Roles for more information)
- Kick [display name] - remove this guest from the session immediately
- Open control buttons - manually open a mini menu of the control buttons when display size is limited by resizing the window.
Hover Controls
These control icons provide shortcuts for functions that are also available elsewhere in the interface:
- Talkback mute toggle
- Video mute toggle
- HQ Audio mute toggle
- Open Chat
Full Screen
There is a full screen icon in the lower right of a guest’s video pane that will make their video fullscreen. This can also be used with screen sharing for an optimal display size.
Use the icon in the lower right once more to return to normal viewing size.
Related Articles
Session Recording
Sessionwire’s updated recording capabilities enhance remote collaboration for musicians, producers, and engineers. This guide details the new recording options, including Cloud Recording, Local HQ Audio, Local Camera and Microphone, and the ...Producer Control
Overview Producer Control puts you in the driver’s seat of the sessions hosted in your studio. When enabled you can mute and unmute camera, microphone and HQ Audio streams at their source. In other words you can control a participant's mute status ...Network Statistics
Unlock the full potential of your collaborative music production sessions with Sessionwire's advanced Network Test feature, strategically positioned within your Studio. This comprehensive tool assesses your network's readiness, ensuring a seamless ...Session Settings
Settings You can access the Settings page by clicking on the Settings icon located in Sessionwire’s main application menu on the left-hand side of the interface. The Settings page consists of three sections, which are represented by tabs: Session ...Network Test
Testing Your Network Click on the Network Test icon in the bottom toolbar to launch the browser dialog. In this window you can simply click on Start test to begin the diagnostic test runner. Note: The Network Test is only available to Sessionwire ...